


This recipe is from Good and Cheap.


Good and Cheap is a gorgeous cookbook for people with limited income, particularly on a $4/day food stamps budget. The PDF is free (ahora en Español!) and has been downloaded more than 15,000,000 times. I have more cookbooks, too!
Still looking to maximize friend and family time in this zone between Christmas and New Years? Cooking and baking together can be so much fun, and perogy-making is the perfect project to do in groups! And hearty, cheesy, starchy, satisfying perogies are just what your body craves during the cold months. In my hometown, Edmonton there is a big Ukrainian population and Ukrainian grandmothers often gather in church basements to make the most delicious perogies together. So let’s be inspired by them and have a perogy-making party! The best part is that everyone can leave with a bag or two of these delicious cheddar and potato perogies for the freezer.
Perogies are an amazing opportunity to use up and transform leftovers. If you have leftover mashed potatoes you can skip the potato boiling part and just start adding additional flavors to the potatoes for the filling. Leftover shredded turkey or sweet potatoes or chopped roasted vegetables would be great here too. Whatever appeals to you! Homemade perogies are incredible, the dough is so tender and the filling is completely to your taste. There’s nothing like them.
Perogy making parties are fantastic because you can chat and visit while you shape the perogies and the time flies by. You feel so accomplished when you also just spent a bunch of time gabbing with your pals. If you have time for a gathering right now I know you’ll be so happy with the results, especially when you pull a bag of these out of the freezer on a cold January evening in the not too distant future.
Cheddar and Potato Perogies


Ingredients
- 4 1/2 cups all purpose flour
- 2 tsp salt
- 2 cups yogurt or sour cream
- 2 large eggs
- 1 Tbsp water (as needed)
- 5 russet potatoes roughly cubed
- 1 1/2 cups cheddar grated
- Salt and pepper to taste
- 2 Tbsp scallions chopped
- 4 cloves roasted garlic minced
- 2 Tbsp dijon mustard
- 1 tsp cayenne pepper
- 1 tsp paprika
- leftover turkey shredded
- sour cream
- scallions chopped
Instructions
- In a large bowl, mix the flour and salt. Pour in the yogurt, eggs, and a tablespoon of water. Mix it slowly and carefully. The dough will be quite sticky. Cover it with a towel or plastic wrap while you make the filling.
- Put the chopped potatoes in a pot and cover with water, then add a bit of salt. Cover with a lid and bring to a boil over medium-high heat before removing the lid. Let the potatoes cook until tender, about 20 minutes. Test them with a fork: if it goes through easily, they’re done.
- Drain the potatoes and add grated cheese, salt, pepper, and any additions from the list (do consider holiday leftovers here!). I like strong aged cheese because you don’t have to use as much. I usually use several additions, and you should play around with some of your favorite things—there aren’t many flavors that don’t work in potatoes! Next, mash the potatoes with an electric mixer or just two forks. Once the filling is ready, gather some friends because shaping takes some time!
- Flour your countertop liberally. Split the dough in half. Keep one half covered, but place the other half on the floured surface. Use a rolling pin to flatten the dough, about ¼” thick. Punch out as many 3” to 4” dough circles as possible, using a round cookie cutter or a drinking glass. Squish the scraps into the remaining covered half of the dough.
- Drop about a tablespoon of filling in the center of one circle of dough. Fold the dough over the filling and press the edges to create a dumpling. The stickiness of the dough should ensure a tight seal.
- Lay the dumpling on a floured surface and use a fork to squish the edges together. Repeat until you run out of circles, then repeat everything with the remaining dough.
- Once you have all your perogies formed, boil a pot of water and add about 12 perogies. Let them cook until they rise to the top, about 1 minute. Pull out the boiled perogies with a spoon, making sure they are drained of water, then repeat with the remainder in the same pot of water.
- If you’re planning to freeze some of the perogies, let them cool down post-boiling and then put them in freezer bags with the air squeezed out. I usually do 12 to a bag, but you can portion them out in whatever way suits you. They will keep for at least 6 months in the freezer.
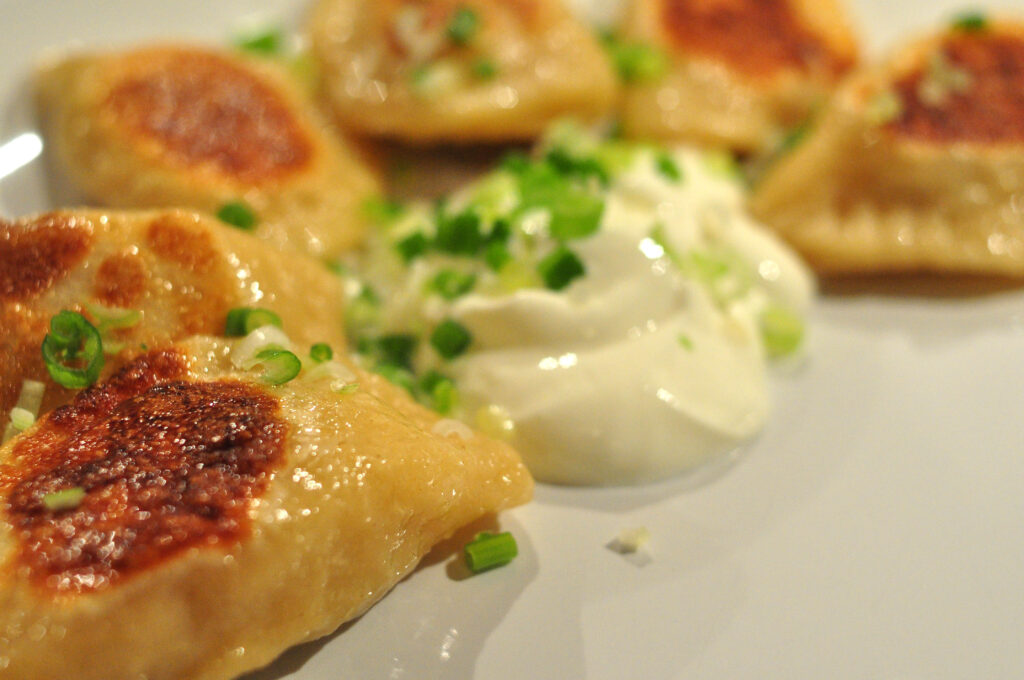
- You can eat the perogies just boiled, but if you’re anything like my family, you’ll prefer them fried afterwards. Melt a tablespoon of butter in a pan on medium heat, then fry up as many perogies as you want. (Six per person is plenty, these are really rich and filling.) Flip them every few minutes until they’re browned on all sides. Serve with scallions and a dollop of sour cream.