Archives

Spicy Ginger-Honey Blondies

This recipe is from Good Enough.

Good Enough cover

My newest creation, Good Enough, is a self-care cookbook that offers personal and vulnerable storytelling, delicious recipes, and encouraging advice to teach you how to accept yourself, love yourself, and find peace through the act of cooking. Learn more! I have more cookbooks, too!

The intense, almost sharp sweetness of honey, cut by the spiciness of ground and fresh ginger, amplified by the slightest hint of cayenne, against a background of gooey brown-butter blondies
is quite the experience. I love making desserts because it really feels like play. With savory foods, I always feel like nature is the true cook. A basil omelet, for example, is the product of the chickens and the earth and gentle tending from the farmer. Desserts, though, are somehow authentic to the baker—a treat crafted for a highly specific experience, with sugar carrying that chosen flavor and presenting it to your tongue like a slap on the back. Desserts feel both human and reverent, like art.

Spicy Ginger-Honey Blondies
Print Recipe
TL;DR: Mix up batter and pour into a pan. Swirl spicy honey into the batter and bake at 350°F for 35 to 40 minutes.
Servings
16
Servings
16
Spicy Ginger-Honey Blondies
Print Recipe
TL;DR: Mix up batter and pour into a pan. Swirl spicy honey into the batter and bake at 350°F for 35 to 40 minutes.
Servings
16
Servings
16
Ingredients
  • 1 cup unsalted butter (2 sticks)
  • 1 1/2 cups sugar
  • 4 teaspoons ground ginger
  • 1 heaping tablespoon grated fresh ginger
  • 1 teaspoon fine sea salt
  • 1/2 teaspoon cayenne pepper (plus a pinch)
  • 2 large eggs at room temperature
  • 2 teaspoons pure vanilla extract
  • 2 cups all purpose flour
  • vegetable oil (for oiling the measuring cup) optional
  • 1/2 cup honey
  • flaky sea salt for the top
Instructions
  1. Preheat the oven to 350°F. Generously butter an 8-inch square baking pan.
  2. Melt the butter in a small pot over medium heat. Take it off the heat and let it cool for 5 to 10 minutes.
  3. Meanwhile, place the sugar, 3 teaspoons (1 tablespoon) of the ground ginger, the grated ginger, the salt, and 1⁄2 teaspoon of the cayenne in a large bowl and whisk to combine.
  4. Gently pour the slightly cooled butter into the bowl with the sugar and whisk to combine. Add the eggs one at a time, mixing well after each addition, and then whisk the mixture until it looks like a smooth caramel, 1 to 2 minutes. Add the vanilla and whisk to incorporate it.
  5. Sprinkle the flour over the top of the caramel-colored batter and whisk until no floury pockets remain.
  6. Oil a glass measuring cup, if desired (see note), and add to it the remaining 1 teaspoon of ground ginger and a pinch of cayenne. Add the honey and gently stir to mix it with the ginger and cayenne.
  7. Pour the blondie batter into the prepared pan and smooth it to fill the pan evenly, all the way to the edges. Drizzle the honey mixture over the top and use a butter knife to gently swirl the honey into the batter in long ripples. Bang the pan gently on the counter to even out the batter. Sprinkle the top with flaky sea salt, as desired.
  8. Bake until a knife inserted into the center comes out with just a few little bits of batter on it, 35 to 40 minutes. You want the blondies a little underdone and moist, so you don’t want a perfectly clean knife here. Let the blondies cool to room temperature, then cut them into squares and enjoy. They keep for a week or so in a sealed container at room temperature (although you will probably have eaten them or given them away by then!).
Recipe Notes

Note: Oiling the measuring cup is optional, but it really helps the honey slide out of the cup easily, and you won’t lose a lot of honey sticking to the cup.

Cinnamon and Spice Cream Cheese Rolls

Snail-like rolls of golden brown dough bubbling over with a dark brown filling of sugary goo arranged in a baking tray with a red and green and black checked blanket nestled against the baking tray. Set at an angle.

This recipe is from Good Enough.

Good Enough cover

My newest creation, Good Enough, is a self-care cookbook that offers personal and vulnerable storytelling, delicious recipes, and encouraging advice to teach you how to accept yourself, love yourself, and find peace through the act of cooking. Learn more! I have more cookbooks, too!

I am so proud of these rolls. They were good from the start, but I kept finding excuses to make them again and again because “that recipe needs testing” one more time. No, it didn’t. I just really wanted to make them. They are exactly what I like all at once, both as an end product and as an experience. Kneading the dough and watching it go from shaggy to silky smooth, letting it sit and rise, knowing something exciting is happening. Smooshing together the filling and smelling all the spices and sweetness come together. The shaping and rolling and cutting of the buns. The way they rise and get fluffy and soft and gooey in the oven. It is comfort on comfort on comfort. I can feel my deeper breaths returning as I describe them. These are like cinnamon rolls, but with the cream cheese frosting baked into them, there is even more goo and spice and no sad, dry part in the middle, only a sublime final bite.

Snail-like rolls of golden brown dough bubbling over with a dark brown filling of sugary goo arranged in a baking tray with a red and green and black checked blanket nestled against the baking tray. Set at an angle.
Cinnamon and Spice Cream Cheese Rolls
Print Recipe
TL;DR: Make dough and let it rise for 21⁄2 hours. Mix up filling. Roll out the dough and spread the filling over it. Roll it up, slice, and let rise for 30 minutes. Bake at 375°F for 25 minutes.
Servings
12 rolls
Servings
12 rolls
Ingredients
Dough
  • 3 1/2 cups all purpose flour plus extra to dust the countertop
  • 1 1/2 teaspoons fine sea salt
  • 1/4 cup sugar
  • 2 1/4 teaspoons instant yeast (1 package)
  • 3/4 cup water at room temperature
  • 4 tablespoons unsalted butter melted; plus more, at room temperature, for greasing the bowl
  • 2 large eggs
Filling
  • 1/2 cup unsalted butter (1 stick), at room temperature
  • 4 ounces cream cheese (1⁄2 package), at room temperature
  • 1 cup light brown sugar packed
  • 1 tablespoon ground cinnamon
  • 1 teaspoon ground cardamom
  • 1/2 teaspoon ground ginger
  • 1/2 teaspoon ground cloves
Instructions
  1. Make the dough: Place the flour, salt, sugar, and yeast in a large bowl or the bowl of a stand mixer. Give it a quick stir.
  2. Place the water, melted butter, and eggs in a medium bowl and whisk, breaking up the yolks, until the liquid becomes frothy and yellow, about 1 minute.
  3. Combine the wet and dry ingredients: With a stand mixer: Using the paddle attachment, turn the mixer to low and slowly pour the wet mixture into the flour mixture until it comes together into a shaggy dough, about 2 minutes. Switch to the dough hook and knead on a low-medium setting until the dough is smooth and elastic, about 5 minutes. By hand: Lightly flour a clean countertop. Slowly pour the wet mixture into the flour mixture and, using your hands or a wooden spoon, mix everything together until a shaggy dough forms. Dump the dough onto the counter and knead until it is smooth and elastic, 7 to 10 minutes.
  4. Grease a large bowl lightly with butter. Shape the dough into a ball, place it seam side down in the bowl, then turn it over so that every side of the ball is lightly greased. Cover the bowl with plastic wrap or a moist towel and let the dough rise in a warm spot until it has doubled in size, 2 to 21⁄2 hours. It can take more or less time depending on humidity and heat levels. The hotter and more humid, the faster it grows.
  5. While you are waiting for the dough to rise, make the filling: Place the butter, cream cheese, brown sugar, cinnamon, cardamom, ginger, and cloves together in a bowl and cream together with a mixer or wooden spoon to form a smooth paste.
  6. When the dough has risen, dust your countertop with flour. Punch down the dough and form it into a short log. Using a rolling pin, roll the dough into a rectangle about 1⁄4 inch thick.
  7. Using a spoon or palette knife for icing cakes, spread the filling evenly over the rectangle of dough. Roll it up lengthwise, like a carpet. Slice the log into 12 rolls as evenly as you can.
  8. Place the 12 rolls into a glass baking dish with the swirl facing up. Cover the rolls with plastic wrap or a moist tea towel and let them rise until they have puffed up just a bit and are getting chummy with one another in the dish, 20 to 30 minutes.
  9. Meanwhile, preheat the oven to 375°F.
  10. Bake the rolls until the tops are golden brown and the bottoms are just golden, about 25 minutes. (You should be able to see the color of the bottoms through the glass baking dish.) You want them fully cooked, but not overcooked, or they won’t be as gooey as you want. Serve them as soon as they are cool enough to handle and not burn anyone’s tongue. They will keep, covered, in the fridge for a few days, or if you want to save some for later, wrap them up and freeze them for up to a couple of weeks.
Recipe Notes

Note: I like to prep this recipe in advance to make mornings a little easier. The dough can be made through Step 4, covered, and refrigerated. The next morning, put it on the counter, do your thing for 1 hour as it comes to room temperature, then make the filling and continue with the recipe.

Sunday Morning Pancakes with Coffee Syrup

This recipe is from Good Enough.

Good Enough cover

My newest creation, Good Enough, is a self-care cookbook that offers personal and vulnerable storytelling, delicious recipes, and encouraging advice to teach you how to accept yourself, love yourself, and find peace through the act of cooking. Learn more! I have more cookbooks, too!

One day I decided to stop trying to make pancakes healthy, and that was the time my husband said, with eyes wide, “Wow, sometimes I forget how good a cook you are, and then this happens.” So now, of course, I make them this way all the time. I am as vulnerable to flattery as the next person. These pancakes are rich, pillowy, buttery, and really quite cakey, but without the sweetness. They leave the job of sweetness for the syrup, and for their part they will soak that syrup up expertly.

You can easily add berries, banana slices, or chocolate chips to these pancakes. Simply sprinkle them on top of the pancakes after you have them in the pan, but before the flip to the second side. This works much better than trying to add the mix-ins to the batter itself.

In our house, we often make slightly more coffee than we can drink before it gets cold. Sometimes, by the time we get done running around after a small person, what’s left in the pot isn’t that appealing. So one day, when we had run out of maple syrup, I thought I should take that unappealing cold coffee and add sugar and heat. The result is surprisingly dark and complex, without being too in your face about its coffee-ness. Pouring this syrup over your pancakes creates the feeling of a great diner experience, where the smell of coffee is always in the background.

Sunday Morning Pancakes with Coffee Syrup
Print Recipe
TL;DR for Pancakes: Mix batter, let it sit for 10 minutes, then cook the pancakes in a hot pan. TL;DR for syrup: Bring leftover coffee and sugar to a boil, thicken into a syrup, and add vanilla.
Servings
8 to 10 pancakes and 1 cup of syrup
Servings
8 to 10 pancakes and 1 cup of syrup
Ingredients
Pancakes
  • 1 cup all purpose flour
  • 1 tablespoon baking powder
  • 1 tablespoon sugar brown or white
  • 1 teaspoon sea salt
  • 2 large eggs at room temperatutre
  • 1/2 cup butter plus more for the pan
  • 1 tablespoon apple cider vinegar or distilled white vinegar
  • 1/2 cup plain yogurt
  • 1/2 cup whole milk
  • fresh fruit for serving
Coffee Syrup
  • 1 1/4 cups brewed coffee
  • 1 cup sugar
  • 1/2 teaspoon vanilla extract
Instructions
Pancakes
  1. Measure the flour, baking powder, sugar, and salt into a small bowl and give it a quick whisk so that all the ingredients are reasonably distributed.
  2. Crack the eggs into a large bowl and whisk them. Melt the butter in the microwave or on the stovetop and, whisking continuously, pour it into the egg mixture slowly, to prevent scrambling the eggs. Whisk until you have a smooth, thick, yellow liquid that looks kind of like hollandaise.
  3. Pour the vinegar into a liquid measuring cup, then add the yogurt and milk and stir. You should have 1 cup total. Let the mixture sit for a couple of minutes. Then, whisking continuously, slowly pour it into the egg mixture.
  4. Sprinkle the flour mixture over the wet mixture and gently mix it with a wooden spoon until most of the dry ingredients are incorporated. It’s okay to leave the batter a little lumpy because the lumps will cook themselves out. It’s much better to undermix than to overmix and have tough, chewy pancakes. Let the batter sit for 10 minutes.
  5. Preheat the oven to 150°F or the warm setting. Place an oven-safe plate or baking sheet in the oven—that’s where you’ll leave finished pancakes to keep warm while you make the rest.
  6. Place a cast-iron skillet over medium-low heat. Add a pat of butter to the pan and gently swirl it to coat. Use a ladle to pour a dollop of pancake batter into the buttered pan. It should become reasonably round naturally. It looks messy but will seize up and start cooking soon, so don’t panic. I usually do two pancakes at a time in our pan, but you can do more if your pan is bigger or if you are braver.
  7. Let the pancakes cook until bubbles begin to form not just around the edges but all the way through to the middle and they begin to look a little dry at the edges, 2 to 3 minutes. Then use a spatula to flip them over with confidence. Cook until they are just lightly browned on the bottom, another minute or so. The second side is always faster. Remove the pancakes from the pan and place them on the warming plate in the oven. (The truly perfect time to flip is just before the edges begin to dry out. You’ll get the hang of it with practice.)
  8. Repeat until you are finished with the pancake batter, adding more butter to the pan in between each batch.
  9. Serve the pancakes warm with Coffee Syrup (or your favorite syrup), fresh fruit, and whatever else you like!
Coffee Syrup
  1. Pour the coffee and sugar into a small saucepan. Bring to a boil over medium heat, then turn the heat down to medium-low and simmer until the liquid thickens into a syrup, about 20 minutes.
  2. Remove the pan from the heat, add the vanilla, and stir.
  3. Use the syrup immediately over pancakes, plain oatmeal, yogurt, ice cream, coffee cake, and so on. Or let the syrup cool and store it in an airtight canning jar or bottle in the fridge for up to a month.

Salted Maple Butter Tarts

salted maple butter tarts

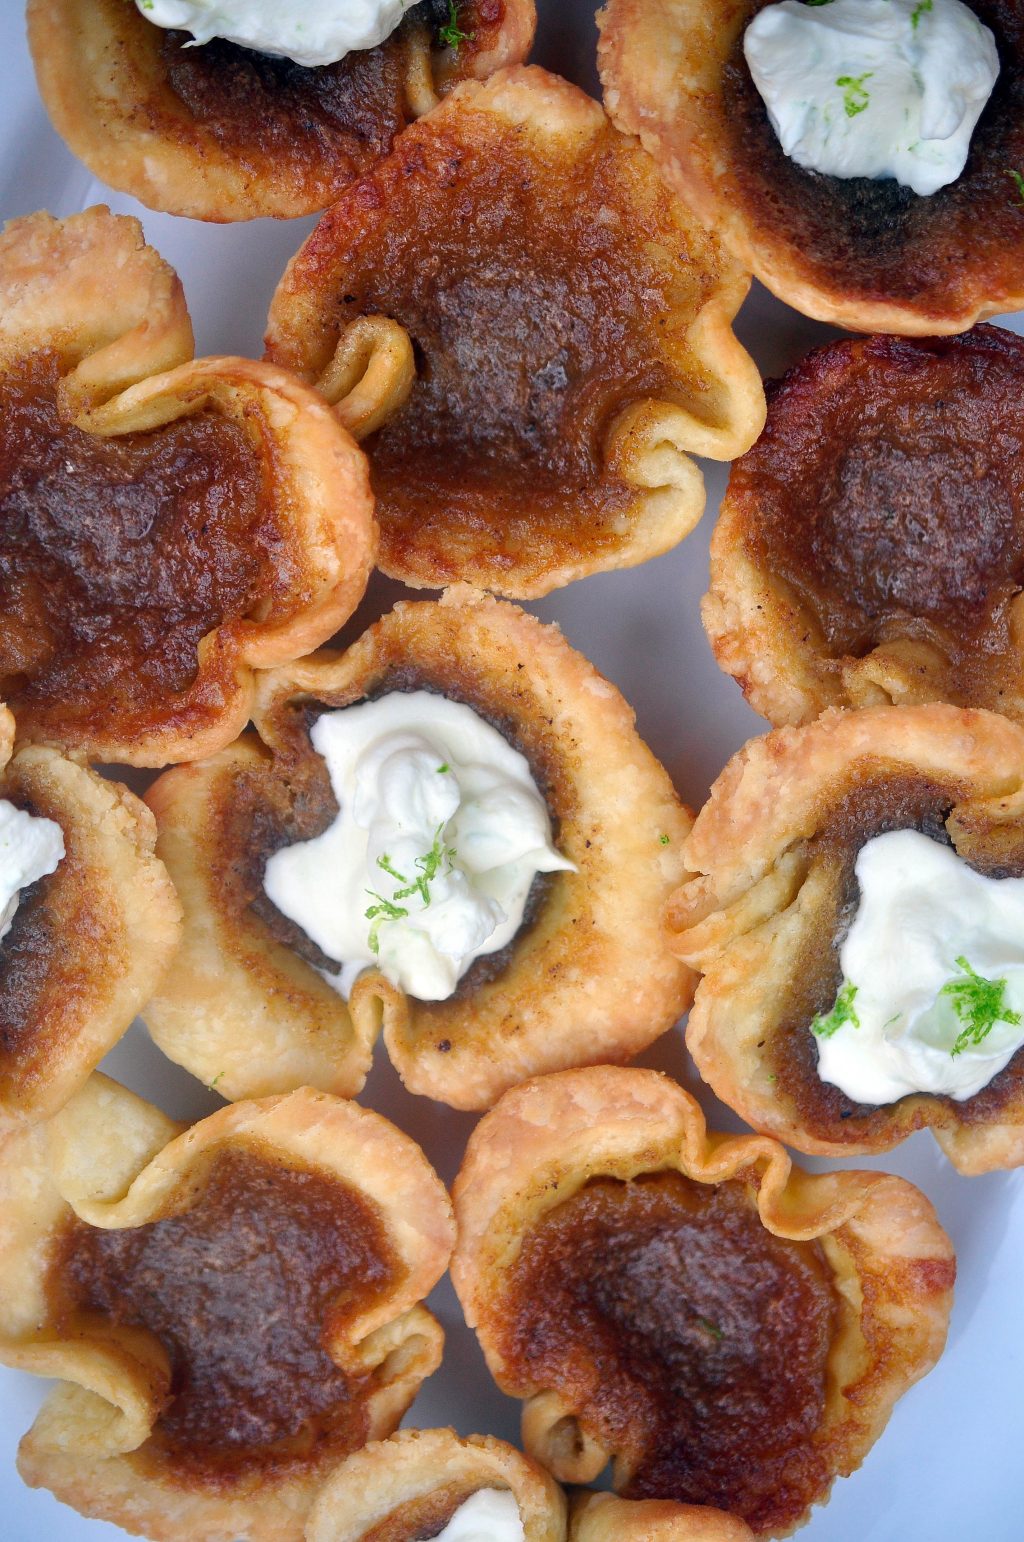
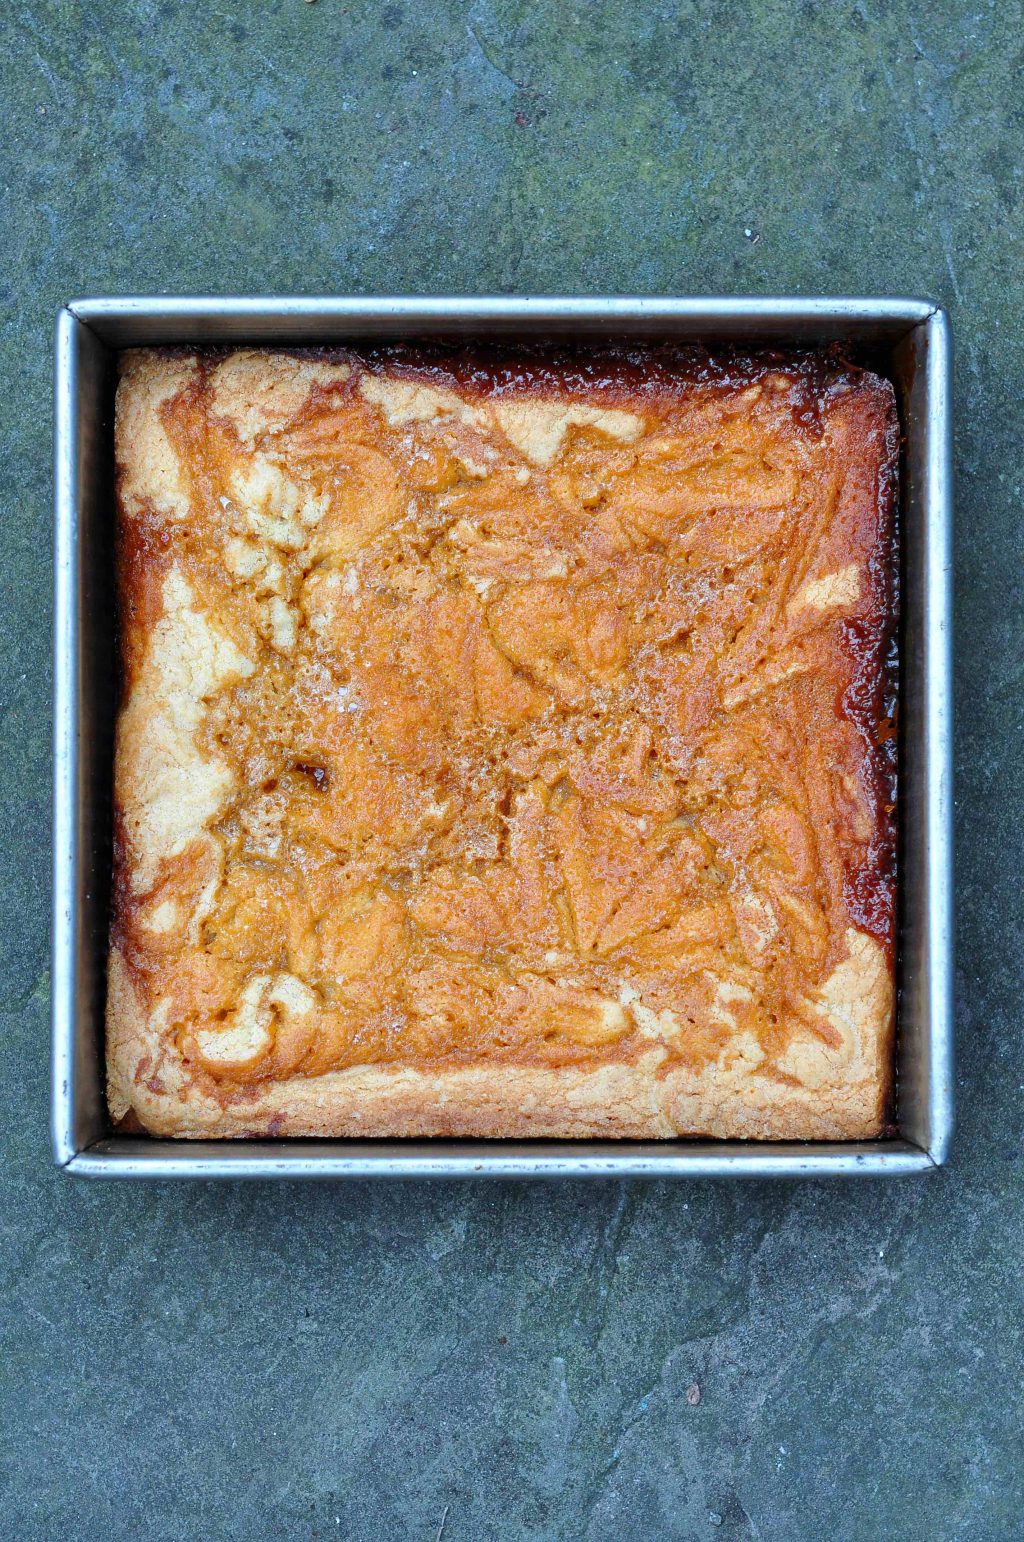
Around the holidays in Canada, butter tarts—a pastry case full of a sort of butterscotch goo often with raisins added—are everywhere. The filling is very sweet, a little grainy and delightfully in between liquid and solid. The original recipe is simply butter, brown sugar and eggs, and it’s wonderful. But swapping some of the sugar for maple syrup, adding a hint of nutmeg, some extra salt on top and an optional lime spiked whipped cream brings some depth. I find these perfect for a moment of quiet reflection with a cup of hot tea.

The crust I’m using here is kind of between pie and tart dough. A bit flaky, but not sweet and easier to work with than pie dough. 


salted maple butter tarts

Salted Maple Butter Tarts

Print Recipe

A flaky pastry case filled with rich maple caramel and topped with a little extra salt and an optional lime spiked whipped cream.
Servings
12 tarts

Servings
12 tarts

salted maple butter tarts

Salted Maple Butter Tarts

Print Recipe

A flaky pastry case filled with rich maple caramel and topped with a little extra salt and an optional lime spiked whipped cream.
Servings
12 tarts

Servings
12 tarts

Ingredients
Crust

  • 1/2 cup


    unsalted butter (1 stick)

  • 1 1/2 cups


    all purpose flour

  • 1 tsp


    sea salt

  • 1


    large egg

  • 2 Tbsp


    water

Filling

  • 2


    large eggs

  • 2/3 cup


    granulated sugar

  • 1/4 tsp


    freshly grated nutmeg (optional)

  • 1/2 cup


    maple syrup

  • 1/2 tsp


    sea salt (plus more for finishing)

  • 1/3 cup


    unsalted butter

Lime Whip (optional)

  • 1/2 cup


    whipping cream

  • 1 Tbsp


    granulated sugar

  • zest of


    1 lime

Instructions
  1. Freeze the butter for 10 minutes.

  2. In a medium-sized bowl, whisk together the flour and salt. Using a box grater, grate the butter into the flour mixture and gently mix with hands so flour is coating the butter.

  3. In a small bowl, crack the egg and add the 2 Tablespoons of water and whisk. Pour it into the bowl and quickly and gently mix the dough until is forms a reasonably coherent dough. You are not going for smooth, just together.

  4. Cover the dough in plastic wrap and let it chill for 1 hour or longer.

  5. When ready to make the tarts, set the oven to 375 F. Set out a 12 tin muffin tray.

  6. Cut the cold dough into 12 equal pieces and roll them into rough circles, being careful not to overwork. Sprinkle some flour on the counter to prevent sticking and roll out each piece until it is about wide enough that you can fit it into the muffin tray like you would be making a little cup with at least ½ inch of excess pastry coming above each tin.

  7. Do this for each of the 12 tins then set the whole tray in the fridge while you make the filling.

  8. In a medium-sized bowl, whisk the eggs and sugar until they are slightly lighter yellow, about a minute. Grate in the fresh nutmeg if using, then add the salt and maple syrup and whisk to combine. Finally pour in the melted butter and whisk until light and smooth.

  9. Using a ladle, fill each pastry lined muffin tin with filling, fill a little below the top so the filling has a bit of room to expand.

  10. Bake for 20 minutes, or until the bottoms are browned and the filling is bubbling all the way through. After you pull them out, sprinkle each one with a generous pinch of sea salt or flaky finishing salt like fleur de sel if you have it. Let them cool in the tins completely or remove while still warm to fully cool on a rack or plate.

  11. If making the whipping cream simply whisk the cream, sugar and lime zest together until soft peaks form. Dollop onto the tarts and enjoy!

Leanne Brown

Hi, I'm Leanne Brown. I’m a bestselling cookbook author. I want to help you find peace, healing and freedom through cooking.

Sign up for my newsletter!

Subscribe
Good Enough cover

My newest creation, Good Enough, is a self-care cookbook that offers personal and vulnerable storytelling, delicious recipes, and encouraging advice to teach you how to accept yourself, love yourself, and find peace through the act of cooking. Learn more here!

Good and Cheap cover 2nd edition

Good and Cheap is a gorgeous cookbook for people with limited income, particularly on a $4/day food stamps budget. The PDF is free (ahora en Español!) and has been downloaded over 15,000,000 times. For more info, see All About Good and Cheap and Donation Impact.

Sign up for my newsletter!

Subscribe