Favorite Pumpkin Pie
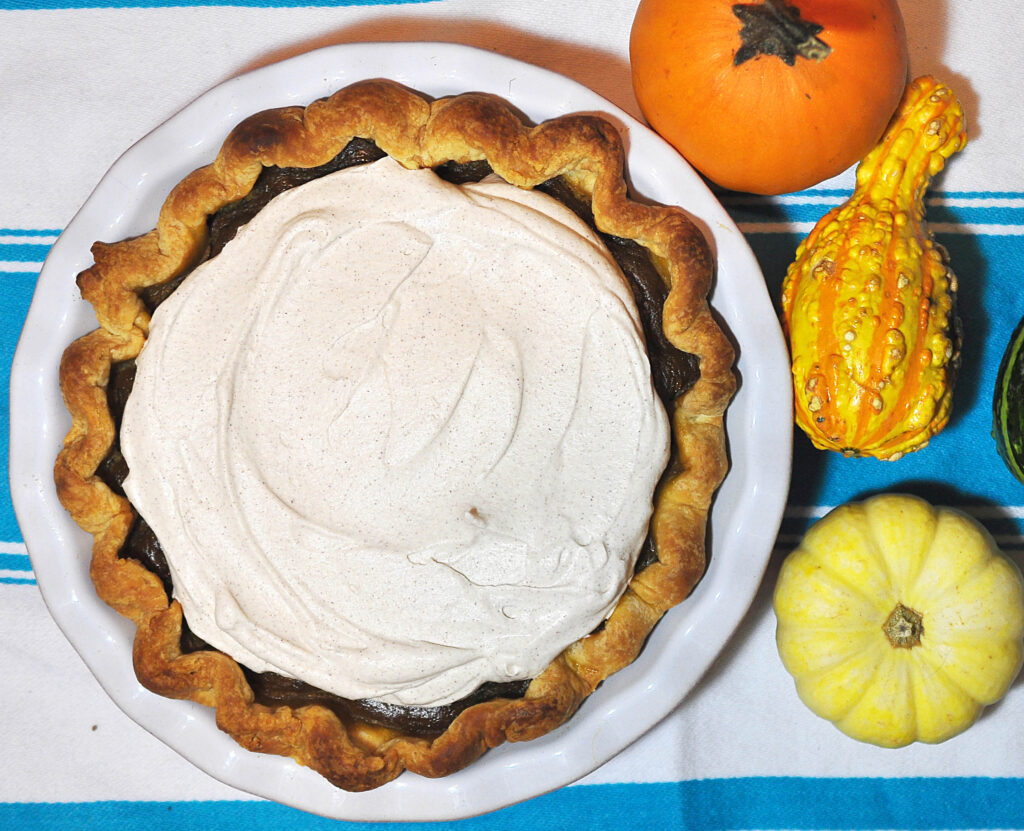
Here’s a heavily spiced pumpkin pie with brown sugar and a simple short crust. And it’s MUCH easier than I thought.
I know it’s late! I know you probably have your Thanksgiving plans carved into stone tablets already BUT if any of you are like me and are putting things together last minute for whatever reason… well here is my favorite pumpkin pie recipe! I came up with it for a fun video I did for NYU a couple of years ago making pie with then NYU President John Sexton. And I shared the recipe then. But this year’s version is both better and easier.
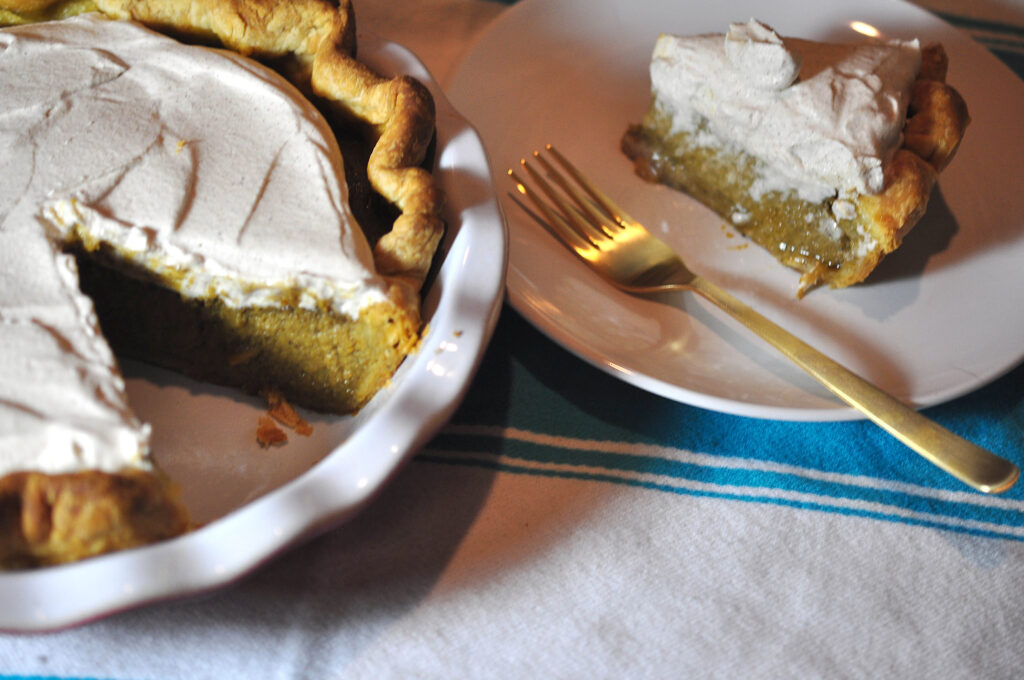
Since then I have realized that the crust on this pie actually turns out beautifully when you don’t blind bake it and I’ve tinkered with several other things and simplified it so it tastes just as good (maybe better??) but is significantly less fussy. And you don’t need a food processor to make the crust. Improvements? I think so. Sorry for the lousy photo quality. I ran out of daylight.
Lastly, pumpkin pies are my favorite of the Thanksgiving standards, but if you prefer sweet potato (who could blame you, they are awesome too!) or butternut squash you can substitute them for the pumpkin puree, or even do a blend of sweet potato and pumpkin. This is my favorite style, with the dark richness of molasses from the brown sugar and a strong hit of cinnamon and spices and even a little zing from the orange zest. Don’t forget to add the cinnamon or orange zest to the whipped cream, it makes it that much more special.
Okay, I love you all. Thank you for bearing with me through my absences. I hope to be with you again more regularly soon!

- 1/2 cup butter (1 stick)
- 1 1/4 cups all purpose flour
- 1/2 tsp salt
- 1/4 cup +1 Tbsp water
- 2 large eggs
- 2 cups pumpkin or squash puree
- 3/4 cup dark brown sugar packed
- 1/2 tsp salt
- 1 Tbsp orange zest (or one small orange worth)
- 2 tsp cinnamon
- 1 tsp ginger powder
- 1 tsp cardamom powder
- 1/2 tsp nutmeg freshly grated
- 1/4 tsp ground cloves
- 1 cup whipping cream
- 1 cup whipping cream
- 2 Tbsp sugar
- 1/2 tsp cinnamon or orange zest
- Freeze the stick of butter for 20 to 30 minutes.
- While the butter chills, add the flour and salt to a bowl and stir briefly to combine.
- Using the largest grater section of your box grater (just the basic cheese one not the super fine one) grate the stick of butter.
- As quickly as you can, add the butter curls into the bowl with the flour and mix it up just a bit with your fingers, covering the frozen butter with flour. Working quickly, pour the quarter cup of water into the bowl and use your fingers to bring the dough together roughly. Work as quickly as you can mixing it, but try not to break up the butter too much. You want to have bits of butter popping throughout the pastry — that’s what creates flakiness. If it's still just too dry add another Tbsp of water.
- Finally, dump the rough dough out onto a clean countertop and bring it together into a rough disc shape with your hands. Cover it tightly with plastic wrap and leave in the fridge for an hour or overnight if you are making it the next day.
- After an hour, remove the dough from your fridge and let it rest on the counter for 5 minutes so you can roll it our more easily.
- Set the oven to 425 degrees F.
- Sprinkle a clean counter liberally with flour. Use a rolling pin to roll out the dough straight in front of you. Once you have rolled a couple of times, pick up the dough and flip it over. Then rotate the dough 90 degrees. Roll out the dough another couple of times. Flipping it and rotating it will keep it from sticking to the countertop and help you make an even circle. Sprinkle more flour onto the counter if anything gets sticky. Don’t be shy with the flour! Repeat this process until you have a large enough circle of dough to fit your pie dish (I use a 9 inch dish here), with some excess. You want to have pastry that is hanging over the edge of the pie plate, because it helps create a nice edge and lets you fix any mistakes you make.
- Transfer the dough to a 9 inch pie dish and press it gently in place. You want about an inch of excess pastry hanging all the way around the rim. Trim away any pieces that are longer. Use your fingers in a pinching motion to roll excess dough up to create an edge on the lip of the pie plate. Squish this down with your fingers or a fork to create a rim around the lip of the pie. Alternatively, use a pinching motion to crimp the edge. If you are a but mystified by this process just do a google search and you can find lots of tutorials on youtube!
- Refrigerate the pie dough while you make the filling.
- To make the filling add the eggs to a bowl and whisk quickly to break up the yolks. Next add the pumpkin puree and sugar and whisk again. Add the salt, zest and all the spices and whisk again. Finally add the whipped cream and slowly and carefully whisk it into the thicker mixture. You only need to be careful here so you don't splash cream on yourself. Once the filling is smooth and even you're done!
- Take the prepared pie crust out of the fridge and gently pour the filling into the crust.
- Carefully place the pie in the oven and bake for 45 minutes. After 45 minutes check the pie. If it is still wiggly and wet in the middle leave it for another 5 to 15 minutes. I find it needs 50 minutes to an hour total, but some ovens are crazy so check it at 45 just in case. If you aren't sure if it's too wet, remove it from the oven and test with a toothpick or knife, if it comes out mostly dry (you may get moisture on it, but no clumps—it's a custard pie after all, you do want some moisture!) it's ready.
- Once the filling is no longer jiggly, pull it out of the oven and let it cool to room temperature (this usually takes 1 to 2 hours).
- Once the pie is cool prepare the whipped cream. In a large bowl or stand mixer add the whipping cream, sugar and zest or cinnamon. Whip it with a whisk, or electric mixer until soft peaks form. Taste the cream and if you think it needs a little more sugar, zest or cinnamon add it now. Whip it a few more times until it's a consistency where if you drop it off the spoon it stays fairly well in place rather than oozing out.
- Spread the whipped cream over the top of the cooled pie in a nice even layer, or in dollops, whatever way you like. Sprinkle with more cinnamon or orange zest if you like. Serve immediately or leave in the fridge until ready to serve.


